
Had a wonderful day volunteering at Roadworks, a street fair put on by the San Francisco Center for the Book. D. and I helped as "Inky Hands", mixing ink and preparing the lino cuts for the street-and-steamroller press. This was our first time helping out, but now we know how to steamroll print (though we'd need some steamroller driving lessons first)! Here's what we learned in ten easy steps:

1} Carve a piece of linoleum. This one is 3' x 3', which is slightly less than the width of the steamroller. If you make a 1' x 1' plate then you can fit three across.
2} Dampen your paper in advance. At the fair, we used Rives BFK Heavyweight and Crane Lettra. Both sides had been moistened with a spray bottle and sponge a day before. Then the paper was sealed in plastic until it was time to print.

3} Mix the ink to the desired color. In this case, for each batch I was told to use: 3/4 Daniel Smith Classic Lithographic Black #100 + 1/8 Warm Red + 1/8 Miracle Gel Reducer. It was very similar to mixing oil colors, but much stickier and done in far greater volume.
4} Spread the ink out evenly on a piece of mylar. Here we have three brayers just for that purpose. Lay it out nice and smooth so the brayers don't get blobby when you're charging up with ink.

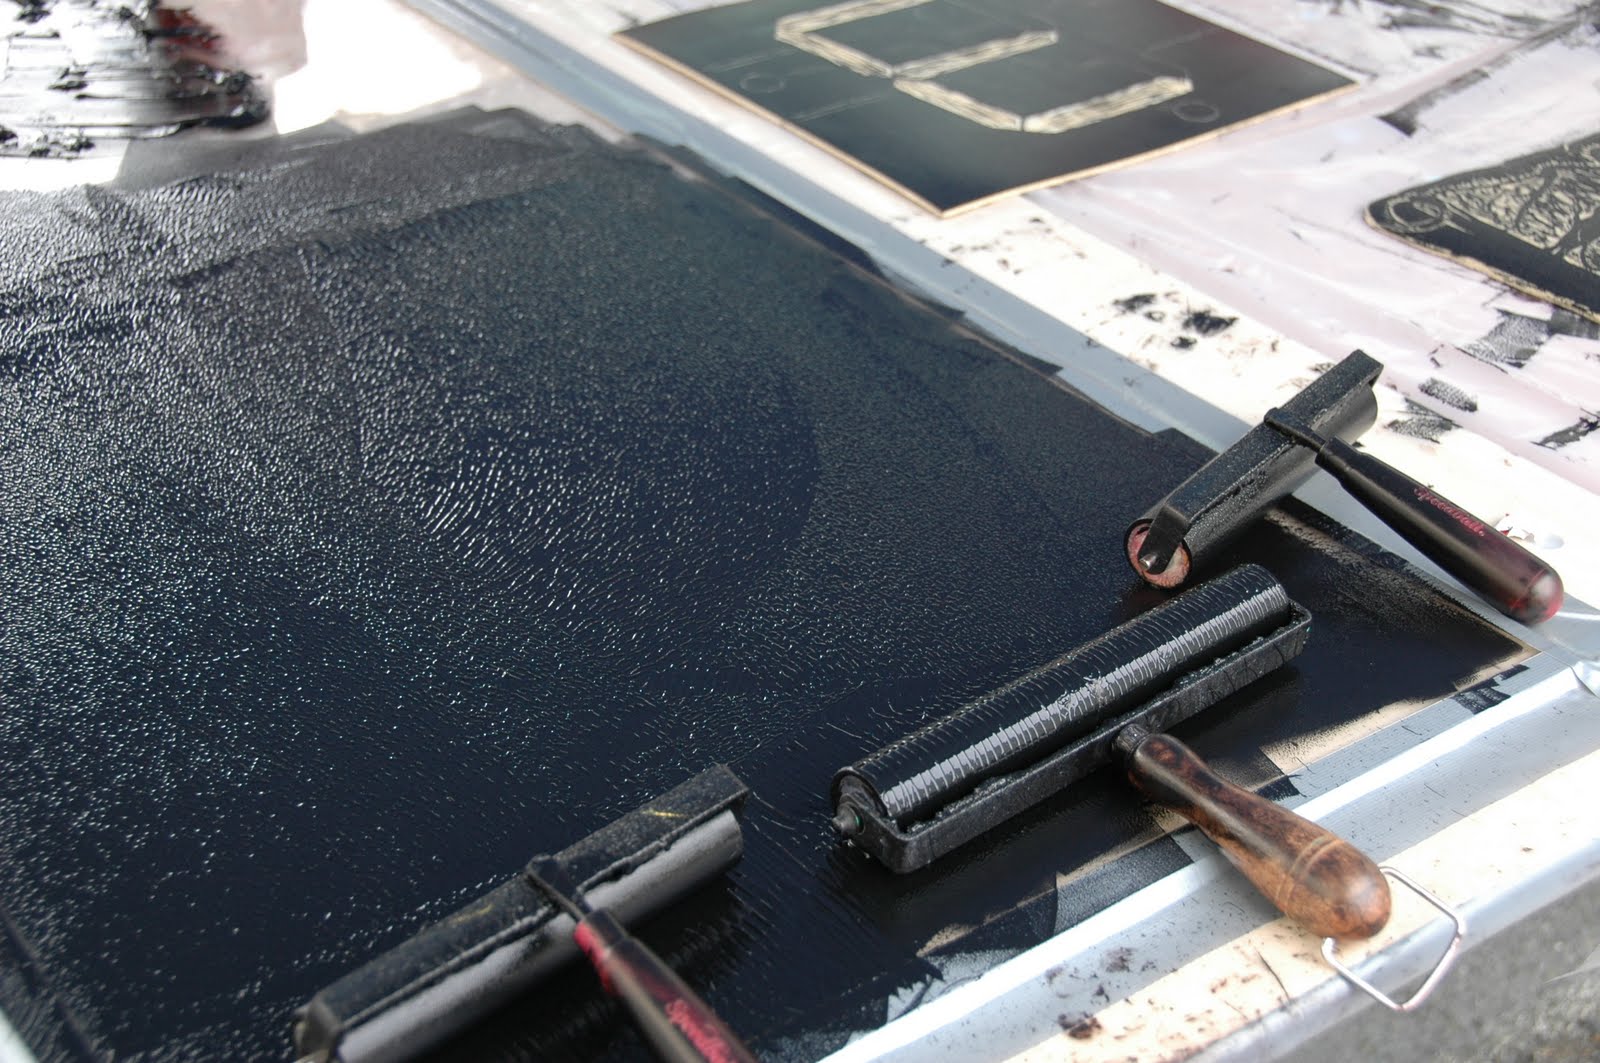
5} Ink the linoleum using smooth strokes that lift up at the end. Don't press too hard, or you'll make lines in the ink. After smoothing it on in one direction, do it again at a 90 degree angle to your first coat. When it looks velvety, it's done. (All this technical info was courtesy of a kind fellow who came all the way from Phoenix for the fair.)

6} Layer the following on the street:
- a 4' x 4' piece of MDF
- a giant piece of mylar (on which you can draw out where to place the linoleum)
- the inked linoleum (face up, of course)
- a piece of paper on top of each piece of linoleum
- thin wool blankets
- a thicker blanket
- an even thicker blanket or shag carpet that covers everything

7} Roll firmly over your street press with your steamroller.

8} Peel back the blankets and have someone with clean hands gently lift the paper off the print. (It's ok to applaud and be excited when the prints are revealed.) Inky handed people can then remove the linoleum from the press for re-inking as needed.

9} Set the prints out to dry. Don't forget little weights if you're outdoors so the wind doesn't blow them away.

10} Decorate an old fence in your neighborhood with your fine work and sell to friends and passers by!
4 comments:
This is SO cool! i've never done any kind of printing, so I'm really curious and fascinated by the process. So cool that you and D. did this together! Please let me know when you'll be doing it again.
@Trina ~ perhaps we could take Letterpress I together? I am definitely planning to volunteer again & will let you know if there's another event. (This one is annual, so for sure next year. D. wants to be an Inky Hand again). ^-^
This is awesome Kimi! I've never heard of this but it looks really fun!
That's amazing. What organization and teamwork! Must feel great to see all that art in the end.
Post a Comment