Showing posts with label unusual media. Show all posts

19 May 2013

ink & pouring medium experiment

I've had this pouring medium sitting on my shelf for quite a while and finally decided to try it out and see what it does. I used an Ampersand watercolor panel but later realized that it was kind of a waste since the pouring medium doesn't really need the panel's special properties of absorbency and such. However, it was nice to have a clean, white and sturdy surface.

I had a selection of inks to use and decided to dropper the ink straight in; in the future I think I'd like a more subtle look so will try pre-blending the color with the medium before putting it on a canvas.


I had the idea that the medium might dry in a thick layer of I blocked it from coming off the edges, so I got some clear packing tape and made a rim around the edge of the panel. Then I poured a little medium down and put some drops of ink in it.


When I tilted the panel, the ink ran and started to blend in some interesting rivulets, but I could see that I'd need more pouring medium to fill the surface.


So I tried a few more drops of color and added a little more pouring medium. The tape on the edges seemed to be working.


I liked it at this stage, but I had to keep tilting the panel in various directions to cover the whole surface.


By the time the entire surface was covered, the ink had spread quite a bit more and it looked like this. I figured that for a first experiment, this was a good place to stop even though it would be interesting to add more layers. I thought it best that this one dry first.


And I was right because gravity was at work and the pouring medium was seeping out from under the tape in one corner. I lifted the panel on blocks to dry so that the drips wouldn't cause the panel to stick to the paper underneath. I was also curious about painting with these excess drips, but as you can see, when I put a brush through the drops and spread them around they became quite transparent. Also, some of the residue remained in the shape of the drop of the brush itself, which was interesting. It was too sticky for me to feel very comfortable with it as a paint.


Since it was dripping anyway, and since I had the panel raised, I decided to cut the tape edge off and let the medium flow off the edge.


Somehow, in the process of removing the tape, I got bubbles in the pouring medium. I tried to pop one but it only flattened a little. I decided they were an interesting texture and left the rest alone.


As it was drying, I decided to check what would happen if I added some paper to the surface. I cut some yellow tissue paper in tiny leaf shapes (tissue paper because I hoped for some transparency) and laid them on the sticky surface. As it dried, they stuck fast. Also, the surface became increasingly shiny and hard.


I ended the experiment there but plan to try putting on another layer with color already mixed into the medium so I have more control over it. I also want to try perhaps drawing on this layer with a Sharpie and/or putting a collage image down before pouring the new medium on top. I think it could be pretty interesting to create a couple layers that are each sealed in by a new pouring. The transparent nature of each layer could make some neat effects.

I don't care for the glossy surface, but maybe some matte medium as the final layer will handle that? Future experiments await!

12 October 2012

autumn leaves by children


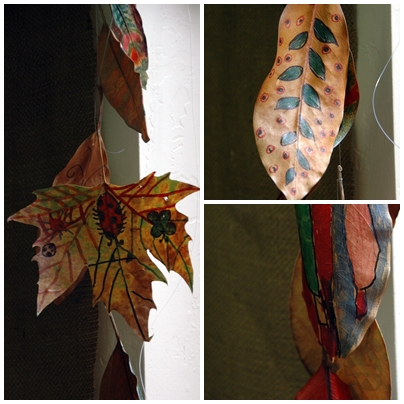
After painting upon my collection of autumn leaves, I shared the idea with my colleague and she had her students gather their own leaves for fall decorations in the classroom. She kept it a little bit easier by giving them Sharpies and even crayon to design their own autumn leaf art.

They hung them with fishing wire, dangling down next to the window. It brings a little bit of the outside in, touched with the children's feelings of fall.

17 September 2012

painting autumn

New autumn decoration on my burlap bulletin board.

At summer's beginning I moved to a new office and became enamored with the magnolia trees that grow outside my window ~ especially the dark, glossy leaves and the unique stamen inside the huge white blossoms that I couldn't help gathering and drawing. Now the leaves are dropping on the paths and they are so beautiful! I picked some up and gave them a little extra color.


I don't know how long they'll last, but autumn is about changes and transitions, so it seems right that the autumn leaf banner I hung may not last too long.


If you'd like a painted magnolia leaf, send me your address at kimikobashi{at}ymail{dot}com and I will make one for you. Hopefully they don't dry too much on the way and arrive crunchy. I'll try to find the freshest dry leaves that I can. :)

Happy Autumn!

10 September 2012

heading somewhere


This weekend I began work on something that has been floating around the peripheries of my imagination for a few weeks. Without being entirely sure what my idea actually is, I gathered supplies and started to put together the skeleton of my creation. As you can see, materialized so far are a set of cotton-candy-colored hills or bosoms, clustered in perhaps a cellular sort of way... and I've only a vague idea where we're headed next.

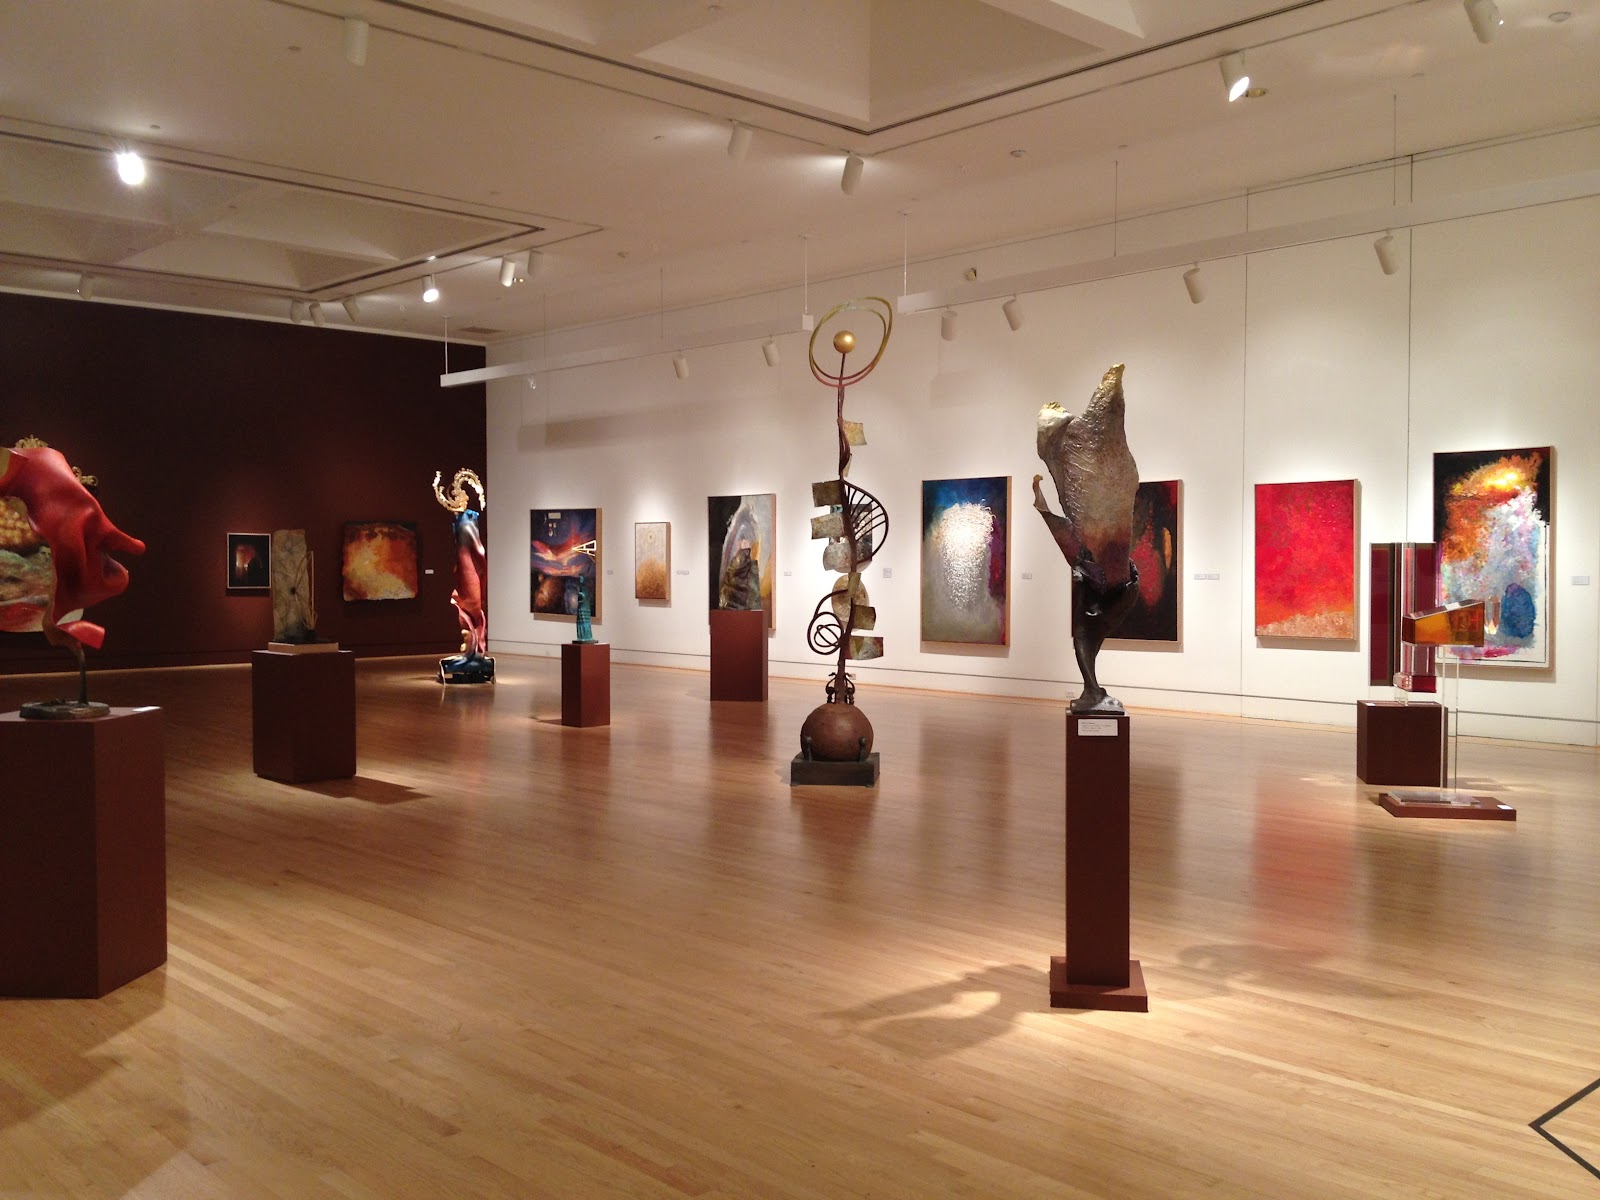
Some of the inspiration for this project came from a visit to the Triton Museum in Santa Clara a short time ago. A gallery of recycled-art sculptures such as this intriguing portrait ~


got me excited about three-dimensional, textured work. My friend Nita, whose background is in architecture, kept exclaiming as we looked at each piece, wondering how the artist arrived at each of the minute choices it took to create the overall piece.


She got me thinking about how I make artistic choices, and that peaceful, creative zone where one just seems to "know" what to do. Faced with the everyday world of chores and grocery shopping and driving to and fro, finding that mental art space doesn't always come easily, but when achieved it's a real joy. Some of my artworks are for a specific purpose or communication and require some planning and forethought. But other times, as in the project I just began, the piece is more about the process and following the vaguest idea that cannot be seen clearly until suddenly, after hours or days of creation, it suddenly manifests itself in the completed artwork.

While I was at the museum, I admired these pointy pencil slippers by Renee Billingslea. I wonder what the artist's initial starting point was when creating these. Was it a prepared statement? Or did she just have a bunch of pencils lying around and thought of something to do with them?


It's true I had a lot of washi paper. It happened to be in these colors, so that explains the palette, though I painted over the green paper as I didn't care for its shade. I added gold, bronze, blue and yellow. Paper circles from an earlier painting prompted the round shapes to be cut out, but I wanted to sculpt, so they turned into cones. I knew I didn't want to paint on a rectangular canvas, so the idea here is that I'm attempting to create a lumpy, more organically shaped canvas to work on.


I had to sew the paper to keep the cone shapes. I had buttons and beads, some of which ended up on the seams. The buttons worried me a little. I thought they might suggest clothing and suddenly the hills looked like a whole lot of brassieres. But I left them, since the paper beginning is only the start. I think more will happen to these hills and in the transformation the buttons may not be too noticeable.

This other room of sculptures and paintings done by another local artist, Harry Powers, got me thinking that a great way to have art is to make it, and not worry about what it's going to end up being.


It's a bit meditative, sewing painted papers and heading who-knows-where. I'll keep you posted on the passage and we'll see where we finally arrive.


23 February 2012

industrial arts inspiration ~ {the crucible}

I took a little drive up to Oakland for an afternoon of industrial arts demonstrations by numerous artisans who've no fear of fire. The Crucible is the kind of place that takes all your latent superhero fantasies of bending glass and twisting metal with your bare hands and makes them... reality! Wow.

We all left with visions of welding enormous metal sculptures, blowing glass bubbles and hammering out swords. Here are a few photos from this amazing, non-profit, educational facility. Once you've learned a trade, you can buy studio hours, go in and make to your heart's content.


He rolled the hot glass in the blue powder on the table for color.

I think the hot glass is so pretty!

(Eventually, he made a pitcher.)


Demonstration on bending glass tubes for neon signs.

He blows air through the tube during the bend so the passage stays open.

This guy was so cool. He gave me two linked heart-shaped tubes "to give to your sweetheart".


Everyone loved the blacksmith.

Twisting metal to make a very strong & handy hook.

You need a hood, protective clothing & eyewear to guard against the sparks & UV rays.

But then you can meld metal together into statues.

Yeah, I'm fired up! :D

Another way to bend steel.

This method feels a little spectacular. :)

Not trash ~ supply bins!

Melted aluminum being poured into ingots.

Hot stuff.

Art everywhere.

Right next to a BART exit so anyone can get there!

07 January 2012

10 artists at bay st. cafe'

The far right panel will be the front page. Middle panel is the back when folded.

The tri-folds open up to reveal the story of the show and its 10 artists.

 As you can see, I've designed a mini-brochure for our upcoming Trans-Pacific Art Show at the Bay Street Cafe' in Fremont, CA! There will be five artists from Japan and five from the Bay Area. We had a meeting today and I came home buoyed by everyone's warmth and enthusiasm ~ really, I was floating up by the ceiling with happiness!

I can't thank Lotfi and Zack, the owners of Bay Street Cafe' enough. The space is beautiful, from the brick exterior to the high ceilings inside and art-deco-inspired murals. Davin, an artist who is helping us put the show together, has also been invaluable in his support.

We found out today that there will also be some coffee art. Check these out!


I hope you'll join us on Opening Night, January 21 at 6:00 pm. 4000 Bay Street is the place to be!

25 May 2011

inspiration: maker faire

I attended the Bay Area Maker Faire last weekend and saw many impressive creations. Some of the more spectacular or intricate photos I shared via twitpic. But one creation that caught my heart was extremely simple ~ an igloo home of milk cartons:


I know it doesn't look like much, but the view from inside was very pretty and there was a surprising amount of room. It brought me straight back to my childhood when my sister and I built clubhouses out of fruit crates and wire twist ties. This one is held together with hot glue.

Bits of sky peek through. Inside it was cozy but roomy.

It took almost 500 milk cartons, I think they said... we'll have to drink a lot and save our cartons for quite a while to make one.

Another friendly landscape, this one of light, air and cloth:


We walked through it, sinking our hands into the chubby trunks. Then we hopped about on colored squares that changed colors with our steps.


The fair covered many types of creativity ~ a truck to climb on with rooms built of piano innards to strum, giant moving fire-breathing sculptures, robots, crafts, solar powered and pedal powered rides, fighting machines and every kind of DIY imaginable. This was our second time attending and we found a few favorites that we remembered from before. My kids and I like building and shooting off rockets and trying to ride bikes that have been taken apart and pieced back together with whimsical (off center) wheels, shopping cart parts, skateboards and scooters.

I would have liked to sit down and learn knitting or felting, but since I brought three boys with me they weren't too interested in such things. If you have the opportunity to attend a Maker Faire, I do recommend it!